Painting and finishing your custom kayak is a great way to personalize and enhance its appearance. Whether you want to change the color, add decorative finishes, or protect the kayak’s surface, this step-by-step guide will walk you through the process. From selecting the right paint to applying the finishing touches, you’ll learn everything you need to know to transform your kayak into a work of art.
Key Takeaways:
- Customizing your kayak’s paint job allows you to express your personal style.
- Marine-grade paint is recommended for durability and resistance to water and UV damage.
- Water-based paint offers flexibility and resistance to cracking.
- Applying a clear coat of varnish or finishing spray helps protect the paint and enhance longevity.
- Proper preparation includes cleaning and sanding the kayak’s surface before painting.
Can You Paint A Kayak? What Paint Should You Use?
Painting a kayak is a popular way to customize and protect the surface of your beloved watercraft. But before you grab a brush, it’s important to know what type of paint to use for the best results. So, can you paint a kayak? The answer is yes, you can, but it’s crucial to choose the right paint that will adhere to the kayak’s surface and provide a durable and attractive finish.
When it comes to kayak paint selection, marine-grade paint is highly recommended. This type of paint is specifically designed to withstand the harsh conditions of boating, including exposure to water, sunlight, and UV rays. It offers excellent durability and resistance to chipping, peeling, and fading, ensuring your kayak’s paint job will last for years to come.
Water-based paint is preferable to oil-based paint for kayaks. While oil-based paint may provide a glossy finish, it tends to be less flexible and more prone to cracking, especially when exposed to fluctuating weather conditions and constant movement. Water-based paint, on the other hand, offers better flexibility and resistance to cracking, ensuring your kayak’s paint will stay intact even during rigorous paddling adventures.
After applying the paint, it’s recommended to finish off your kayak with a clear coat of varnish or a finishing spray. This additional layer of protection will not only enhance the appearance of your kayak but also provide extra resistance against scratches, UV damage, and general wear and tear. It’s important to select a varnish or finishing spray that is compatible with the type of paint you’ve used, ensuring proper adhesion and a seamless finish.
By choosing the right paint and applying it correctly, you can transform your kayak into a stunning work of art while ensuring its surface remains protected from the elements. So, gather your painting supplies and get ready to unleash your creativity on your kayak’s surface.
Table: Pros and Cons of Kayak Paint Selection
| Paint Type | Pros | Cons |
|---|---|---|
| Marine-grade paint | Durable and resistant to water and UV damage | May be more expensive than other options |
| Water-based paint | Flexible and resistant to cracking | May require multiple coats for desired coverage |
| Oil-based paint | Provides a glossy finish | Less flexible and prone to cracking |
“Choosing the right paint for your kayak can make a world of difference in terms of durability and visual appeal. Don’t skimp on quality when it comes to protecting your investment and expressing your personal style.”
Reasons to Paint Your Kayak
There are several compelling reasons why you might want to paint your kayak. Customizing the appearance of your kayak is one of the main benefits of painting. Whether you want to add a splash of color, create a unique design, or showcase your personal style, painting allows you to make your kayak truly one-of-a-kind. Additionally, painting your kayak can help to cover up any scratches or scuffs that may have accumulated over time, giving your kayak a fresh and polished look.
Painting your kayak also provides an opportunity to waterproof the surface. A high-quality marine-grade paint, along with a protective clear coat or varnish, can help to seal and protect your kayak from water damage. This is especially important if you frequently paddle in saltwater or expose your kayak to harsh weather conditions. By creating a waterproof barrier, you can ensure that your kayak remains in top condition and lasts for years to come.
Another advantage of painting your kayak is the ability to incorporate custom graphics and designs. Whether you’re a fan of intricate patterns, bold logos, or nature-inspired motifs, painting allows you to showcase your creativity and express yourself through your kayak. You can even use stencils or decals to create professional-looking designs without the need for advanced artistic skills. With a little bit of imagination and the right materials, the possibilities for customizing your kayak are endless.
In summary, painting your kayak offers numerous benefits, including personalization, waterproofing, and the opportunity for artistic expression. By taking the time to plan your design, select the appropriate paint and varnish, and follow proper application techniques, you can transform your kayak into a visually stunning and durable masterpiece that reflects your individuality and enhances your kayaking experience.

Kayak Painting Supplies List
Before you start painting your kayak, gather all the necessary supplies. Having the right tools and materials at hand will ensure a smooth and successful DIY kayak finishing project. Here’s a list of essential items you’ll need:
Paint
Choose a marine-grade or plastic paint that is suitable for your kayak’s material. Ensure that the paint you select is designed for outdoor use, provides good adhesion, and is resistant to water and UV damage.
Applicators
Depending on your preference and the type of paint you’re using, you’ll need appropriate applicators. Foam paint rollers and paintbrushes are commonly used for smooth and even application. Alternatively, you can use a spray can or spray gun for a more professional and efficient finish.
Surface Preparation
To achieve a flawless paint job, proper surface preparation is crucial. You’ll need sandpaper of various grits to smooth out any imperfections, remove old paint or varnish, and create a surface that the new paint will adhere to. Acetone or a similar type of solvent can be used to clean the surface thoroughly before painting.
Cleaning and Maintenance
Make sure you have dishwashing liquid or boat-wash to clean your kayak before painting. This will remove any dirt, oils, or contaminants that could affect the paint adhesion. Additionally, gather clean cloths and rags for wiping down the kayak and ensuring a dust-free surface. Having a painting mask and protective gloves will help keep you safe during the painting process.
Finishing Touches
Once the paint has dried, you may want to add a protective layer for extra durability and shine. Marine wax or clear finishing spray paint can be applied to protect the paint and give your kayak a polished look. These finishing touches will help seal and protect your hard work.
By having these supplies ready, you’ll be fully equipped to start your DIY kayak painting journey and achieve professional-looking results.
Step-By-Step Guide: How to Paint a Kayak
Painting your kayak can be an exciting and creative way to personalize your watercraft. Follow this step-by-step guide to achieve a professional-looking paint job:
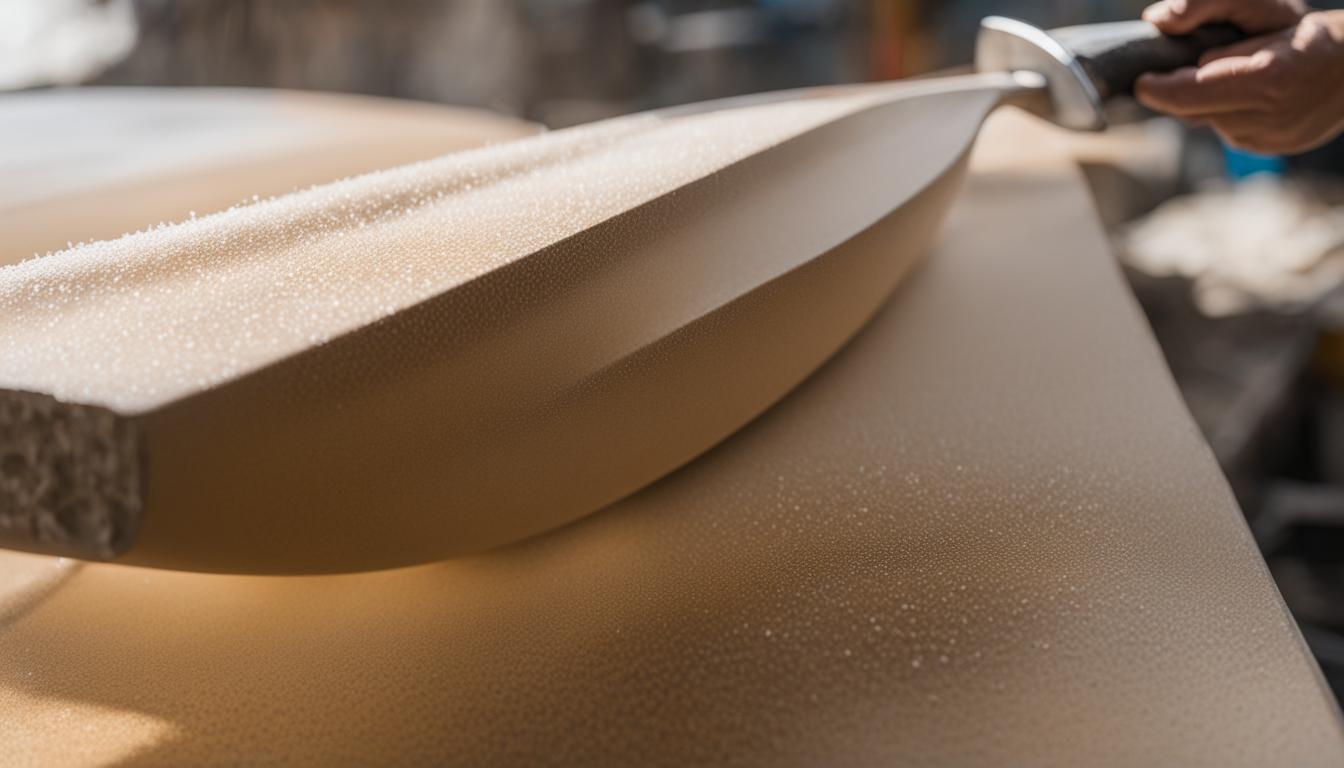
1. Prepare the Surface
- Start by cleaning the kayak thoroughly using dishwashing liquid or boat wash. This will remove any dirt, grime, or oils that may affect the paint’s adhesion.
- Once the kayak is clean, sand the surface gently with fine-grit sandpaper. This will create a rough texture for better paint adherence.
- Wipe down the kayak with acetone to remove any residue and ensure a clean surface for painting.
2. Choose the Right Paint
Select a marine-grade paint that is suitable for your kayak’s material. Water-based paints are often recommended as they provide flexibility and resist cracking. Choose a color or colors that suit your personal style and preferences.
3. Apply the Paint
- Start by applying a thin, even coat of paint using a foam roller, paintbrush, or spray can. Work in small sections, ensuring complete coverage.
- Allow the first coat to dry completely before applying additional coats. Follow the manufacturer’s instructions for drying times.
- Apply multiple coats as needed for the desired color and finish. Sand lightly between coats to remove any imperfections.
4. Add Finishing Touches
Once the paint is dry, you can add any additional decorative finishes or graphics. Use stencils, tape, or freehand techniques to create unique designs on your kayak.
Remember to protect your paint job by applying a clear coat of varnish or finishing spray. This will help protect the paint from UV damage and provide a glossy, professional finish.
5. Maintain Your Painted Kayak
To keep your painted kayak looking its best, follow these maintenance tips:
- Regularly clean your kayak with mild soap and water to remove dirt and debris.
- Avoid dragging your kayak on rough surfaces to prevent scratches and chipping of the paint.
- Store your kayak in a cool, dry place to protect it from UV rays and extreme temperatures.
- Periodically inspect your paint job for any signs of damage or wear and touch up as needed.
By following these step-by-step instructions and properly maintaining your painted kayak, you can enjoy a customized watercraft that reflects your personal style and enhances your outdoor adventures.
Tips and Considerations
When it comes to painting your kayak, there are a few tips and considerations that can help you achieve the best results. Whether you’re deciding between a paintbrush or spray paint, or wondering how long the paint takes to cure, here are some factors to keep in mind:
1. Kayak Painting Tips:
Before you start painting, make sure to properly prepare the surface of your kayak. Clean it thoroughly and sand any rough spots or imperfections. This will help the paint adhere better and result in a smoother finish. Additionally, consider applying multiple thin coats of paint instead of one thick coat to avoid drips and achieve an even color.
2. Kayak Paintbrush vs. Spray Paint:
Choosing between a paintbrush and spray paint largely depends on personal preference and the desired outcome. A paintbrush allows for more control and precision, making it ideal for intricate designs or patterns. On the other hand, spray paint can provide a smooth and even finish, especially for larger areas. If you opt for spray paint, be sure to work in a well-ventilated area to avoid fumes.
3. Kayak Paint Curing Time:
After you’ve finished painting your kayak, it’s important to allow the paint to properly cure before using the kayak. The curing time can vary depending on the type of paint used, environmental conditions, and manufacturer’s instructions. Generally, it’s best to wait at least 48 hours before exposing the painted surface to water or other elements. This will ensure that the paint fully hardens and provides maximum durability.
Keep these tips in mind as you embark on your kayak painting journey. Remember to take your time, follow proper techniques, and enjoy the process of transforming your kayak into a personalized masterpiece.

Table: Pros and Cons of Paintbrush and Spray Paint
| Paintbrush | Spray Paint | |
|---|---|---|
| Control | High | Medium |
| Coverage | Good for intricate designs | Smooth and even for larger areas |
| Application | Precise | Quick and efficient |
| Drying Time | Shorter, more time-consuming | Faster, but requires well-ventilated area |
| Skill Level | Beginner to advanced | Intermediate to advanced |
Kayak Maintenance and Care
Proper maintenance is essential for protecting your kayak’s paint job and ensuring its longevity. By following these simple tips, you can keep your custom kayak looking its best and avoid costly repairs in the future.
Regular Cleaning
Regularly clean your kayak to remove dirt, grime, and saltwater residue that can damage the paint. Use a mild dishwashing liquid or boat-wash solution mixed with water. Gently scrub the surface with a soft cloth or sponge to avoid scratching the paint. Rinse thoroughly with fresh water and let it dry completely before storing.
Storage and Transportation
When storing your kayak, keep it in a cool, dry place away from direct sunlight or extreme temperatures. UV rays can fade the paint and weaken its protective properties. If possible, store your kayak indoors or use a UV-resistant cover. When transporting your kayak, use protective padding or a kayak-specific roof rack to prevent scratches or dents.
Inspect and Repair
Regularly inspect your kayak for any signs of damage, such as chips, cracks, or peeling paint. If you notice any issues, address them promptly to prevent further damage. Use touch-up paint or a clear coat to repair minor scratches, and consult a professional if you encounter major damage that requires professional repair.
| Care Tips | Do Not |
|---|---|
|
|
Conclusion
Painting and finishing your custom kayak is a fun and creative way to make your boat stand out on the water. By choosing the right paint and following the step-by-step guide, you can transform your kayak into a personalized masterpiece. Whether you want to add custom graphics, change the color, or protect the surface, the possibilities are endless.
Remember to take proper care of your painted kayak to ensure its longevity. Sealing and protecting your kayak is crucial in maintaining its appearance and protecting it from the elements. Regular maintenance, such as cleaning and applying a clear finishing spray, will help preserve the paint job and keep your kayak looking its best.
So, if you’re ready to unleash your artistic side and create a one-of-a-kind kayak, gather your supplies and get started. With a little time and effort, you’ll have a custom-painted kayak that reflects your personal style and enhances your kayaking adventures. Happy painting!
FAQ
Can you paint a kayak?
Yes, you can paint a kayak. Painting your kayak is a great way to personalize and enhance its appearance.
What paint should you use?
It is important to choose the right type of paint that will adhere to the kayak’s surface and provide a durable and attractive finish. Marine-grade paint is highly recommended for its durability and resistance to water and UV damage.
Why should you paint your kayak?
There are several reasons why you might want to paint your kayak. Painting can help cover up scratches and scuffs, protect against UV damage, and create a custom look that reflects your personal style.
What supplies do you need to paint a kayak?
You will need marine-grade or plastic paint suitable for your kayak material, foam paint rollers and paintbrushes or a spray can or spray gun for application, sandpaper and acetone for surface preparation, and other essentials like a painting mask, protective gloves, and marine wax or clear finishing spray paint.
How do you paint a kayak?
Follow these steps to paint your kayak: (step-by-step guide provided)
Any tips and considerations for painting a kayak?
Some additional tips and considerations include proper surface preparation, using the right painting technique, and allowing sufficient curing time for the paint to fully dry and cure.
How do you maintain and care for a painted kayak?
To protect and maintain your painted kayak, regularly clean it with mild soap or boat wash, avoid dragging it on rough surfaces, and consider applying a clear coat of varnish or finishing spray for added protection.
Any final thoughts on custom kayak painting and finishing?
Painting and finishing your custom kayak can be a rewarding DIY project that allows you to express your creativity and protect your kayak’s surface. With the right paint, proper application techniques, and regular maintenance, you can enjoy a beautiful and durable finish that enhances your kayaking experience.