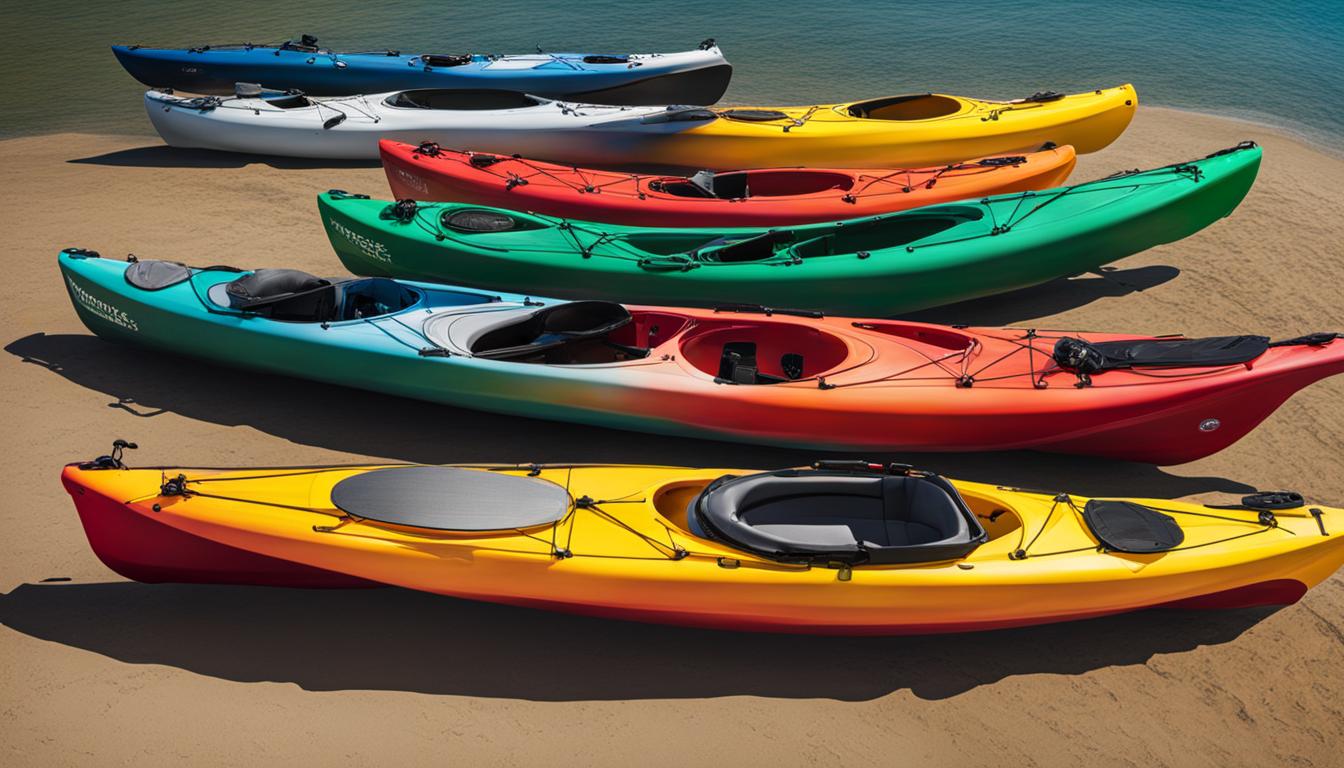
When purchasing a kayak, it’s important to understand the warranty terms to avoid any potential pitfalls. Many kayak manufacturers have specific conditions and exclusions that may affect your warranty coverage. By being aware of these terms, you can make an informed decision and protect your investment.
Here are some key points to keep in mind when it comes to kayak warranty terms:
Key Takeaways:
- Read and understand the warranty terms provided by the kayak manufacturer.
- Pay attention to any exclusions or limitations that may void your warranty.
- Avoid modifying your kayak without consulting the manufacturer, as it may impact your warranty.
- Keep your kayak well-maintained and follow the recommended care instructions to ensure warranty coverage.
- Contact the manufacturer or authorized dealers if you have any questions or concerns about the warranty terms.
Identifying and Fixing Leaks in Your Kayak
When enjoying a day out on the water in your kayak, the last thing you want to deal with is a leak in the waterproof compartment. Not only can it ruin your belongings, but it can also compromise the safety and stability of your kayak. Here are some steps to help you identify and fix any leaks:
1. Inspect the compartment
Start by thoroughly inspecting the waterproof compartment of your kayak. Look for any visible cracks, holes, or signs of damage. Pay close attention to the seams and edges where leaks are more likely to occur. If you spot any issues, take note of their locations.
2. Dry and clean the area
Before attempting to fix the leak, ensure that the compartment is completely dry and free from any debris. Use a towel or cloth to remove any water or moisture. This will help the repair materials adhere properly and ensure a more effective fix.
3. Apply a repair sealant
Depending on the size and location of the leak, you can use various repair sealants to fix the issue. Epoxy putty or marine-grade sealants are commonly used for smaller leaks, while patches or kayak-specific repair kits may be necessary for larger and more complex leaks. Follow the manufacturer’s instructions for application and curing times.
4. Test the repair
Once the repair sealant has cured, it’s important to test the effectiveness of the fix before heading back out on the water. Fill the waterproof compartment with a small amount of water and observe for any signs of leakage. If the repair holds up, you’re good to go. If not, you may need to repeat the process or seek professional assistance.
| Common Causes of Leaks | Possible Solutions |
|---|---|
| Cracks or damage to the hull | Repair with fiberglass or epoxy putty |
| Loose or worn hatch covers | Tighten or replace hatch covers |
| Faulty or damaged bulkheads | Repair or replace bulkheads |
| Improperly installed accessories | Ensure proper installation and use of sealants |
By being proactive in checking for leaks and addressing them promptly, you can ensure a safer and more enjoyable kayaking experience. Regular maintenance and proper storage can also help prevent future leaks.
Repairing Cracks in Your Kayak
When it comes to kayak maintenance, one common issue that paddlers may encounter is a crack in their kayak. Cracks can occur due to various reasons, such as impact with rocks or other objects, improper storage, or general wear and tear over time. Fortunately, you can repair these cracks yourself, saving you the cost and hassle of professional repairs.
To repair a crack in your kayak, follow these steps:
- Step 1: Clean the area around the crack thoroughly with mild soap and water. Ensure that the surface is free from any dirt, grime, or debris. This will allow the repair material to adhere properly.
- Step 2: Dry the area completely before proceeding with the repair. Use a clean cloth or towel to remove any moisture.
- Step 3: Use a kayak repair kit that is suitable for the type of material your kayak is made of. These kits typically include epoxy resin, hardener, and fiberglass cloth or tape.
- Step 4: Mix the epoxy resin and hardener according to the instructions provided in the repair kit. Apply a thin layer of the mixture to the crack using a brush or applicator.
- Step 5: Cut a piece of fiberglass cloth or tape to cover the crack and place it over the epoxy resin. Gently press it down to ensure proper adhesion.
- Step 6: Apply another layer of the epoxy resin mixture over the fiberglass cloth or tape, ensuring that it completely covers the crack and extends beyond the edges of the repair area.
- Step 7: Allow the epoxy resin to cure according to the recommended time provided in the repair kit instructions. This usually takes several hours.
- Step 8: Once the epoxy resin has fully cured, sand the repaired area lightly to smooth out any rough edges or excess material.
- Step 9: Finally, apply a layer of kayak-friendly paint or gel coat over the repaired area to restore its appearance and provide added protection.
By following these steps, you can effectively repair cracks in your kayak and ensure its longevity. Regularly inspecting your kayak for cracks and addressing them promptly will help prevent further damage and ensure a safe and enjoyable paddling experience.

Fixing Dents in Your Kayak
If you’ve noticed a dent in your kayak, don’t fret! Dents can happen from accidental bumps or mishandling, but they can be fixed with a few simple steps. Here’s how you can repair those unsightly dents and get your kayak looking good as new.
Before you begin the repair process, gather the necessary materials: a heat gun or hairdryer, a soft cloth, and some boiling water. Start by heating the area around the dent using the heat gun or hairdryer on a low setting. Be sure to keep the tool moving to avoid overheating the kayak’s surface.
Once the area is heated, take the soft cloth and dip it in boiling water. Place the wet cloth over the dent and hold it there for a few seconds. The heat from the cloth combined with the steam will help expand the plastic and restore it to its original shape.
After removing the cloth, use your hand to apply gentle pressure to the dent, pushing it back into place. Repeat the heating and cloth treatment process if necessary until the dent is no longer visible. Remember to be patient and work slowly to avoid causing any further damage.
In some cases, if the dent is deep or the plastic is severely damaged, you may need to consult a professional for repairs. They have the expertise and specialized tools to fix more extensive damage. However, for minor dents, this DIY method should do the trick.
Replacing a Foam Wall/Bulkhead
If the foam wall separating the cockpit from the dry compartments in your kayak becomes loose or damaged, it’s important to replace it to maintain the integrity and functionality of your kayak. Here are the steps to help you replace the foam wall:
Materials Needed:
- Replacement foam wall
- Adhesive suitable for bonding foam
- Clean cloth
- Rubber gloves
- Utility knife
Step-by-Step Guide:
- Start by removing the old foam wall. Use a utility knife to carefully cut away any remaining foam and adhesive. Take your time to ensure a clean removal.
- Clean the area where the foam wall will be placed. Use a clean cloth to wipe away any debris or residue.
- Apply a generous amount of adhesive to both the kayak and the replacement foam wall. Be sure to use an adhesive that is suitable for bonding foam.
- Press the replacement foam wall firmly against the kayak, ensuring that it is aligned properly. Apply pressure for the recommended duration as specified by the adhesive manufacturer.
- Allow the adhesive to fully cure according to the manufacturer’s instructions. This usually takes several hours or overnight.
- Once the adhesive has cured, test the new foam wall by applying gentle pressure. Ensure that it is securely attached and does not move or shift.
Replacing a foam wall/bulkhead in your kayak is a relatively simple process that can be done at home with the right materials and careful attention to detail. It’s important to follow these steps to ensure a secure and effective replacement. By maintaining the integrity of your kayak’s compartments, you can enjoy a safe and worry-free paddling experience.

Adjusting Outfitting on Your Kayak
Proper outfitting of your kayak is essential for comfort, control, and optimal performance on the water. Whether you’re a beginner or an experienced paddler, making a few adjustments can significantly enhance your kayaking experience. Here are some key outfitting adjustments you can make to ensure a customized fit and improve your time on the water:
Seat Position
The position of your kayak seat can greatly impact your paddling experience. Adjusting the seat forward or backward allows you to find the most comfortable and efficient position for your body. Experiment with different seat positions to find the sweet spot that provides the best balance and control.
Foot Pegs and Braces
Your feet play a crucial role in maintaining stability and maneuverability while paddling. Adjust the foot pegs or braces to ensure your feet are properly supported and in the right position. This will help you maintain a strong and efficient paddling posture and achieve better control over your kayak.
Thigh Braces
Thigh braces provide additional stability and control by allowing you to engage your lower body in your paddling strokes. Adjust the thigh braces to comfortably fit the contour of your thighs, providing optimal support and connection to your kayak. This will enhance your paddling power and overall stability.
Backrest
A properly adjusted backrest can prevent back fatigue and discomfort during long kayaking trips. Adjust the backrest height and angle to find a position that supports the natural curve of your spine and provides maximum comfort. This will help you maintain good posture and reduce strain on your back.
Remember, these are just a few outfitting adjustments you can make to customize your kayak to your body and paddling style. Take the time to experiment with different settings and find what works best for you. Not only will this ensure a more enjoyable kayaking experience, but it will also help you paddle more efficiently and with greater confidence on the water.
Conclusion
Avoiding tricky warranty terms and making smart decisions when purchasing a kayak can save you from future issues. By understanding warranty requirements, identifying and fixing common problems, and choosing the right kayak for your needs, you can ensure a satisfying and worry-free kayaking experience.
When it comes to kayak warranty pitfalls, one common mistake is not carefully reviewing the terms and conditions. Make sure you fully understand what is covered and what isn’t, as well as any specific actions or maintenance required to keep the warranty valid.
Another mistake to avoid is rushing into a kayak purchase without considering your specific needs and preferences. Take the time to research different models, try them out if possible, and read reviews from other kayakers. This will help you make an informed decision and avoid buyer’s remorse.
Remember, safety and quality should be your top priorities when buying a kayak. Don’t compromise on these aspects for the sake of a lower price. Prioritize a kayak that suits your skill level, intended use, and provides the necessary stability and durability for your kayaking adventures.
By keeping these tips in mind, you can navigate through the kayak purchasing process with confidence, avoiding warranty pitfalls and making a choice that will bring you joy on the water for years to come. Happy paddling!
FAQ
How can I avoid tricky warranty terms when purchasing a kayak?
When buying a kayak, make sure to carefully read and understand the warranty terms. Look for clear and straightforward language that outlines what is covered and for how long. Avoid warranties with excessive exclusions or conditions that may be difficult to meet.
How can I identify and fix leaks in my kayak’s waterproof compartment?
To identify a leak, fill your kayak’s waterproof compartment with water and observe for any water seeping out. Once you locate the leak, dry the area thoroughly and apply a waterproof sealant or patch according to the manufacturer’s instructions. Allow the sealant to cure before using the kayak again.
What steps should I follow to repair a crack in my kayak?
Begin by cleaning the crack and removing any loose material. Apply a suitable kayak repair epoxy or adhesive, spreading it evenly over the crack. Use a clamp or tape to hold the cracked area together until the epoxy fully cures. Sand and smooth the repaired area for a seamless finish.
How can I fix dents in my kayak?
To fix small dents, try using a heat gun or hairdryer to warm the area. Gently massage or push the dent from the inside, using a soft mallet or your hands. For larger dents, you may need to consult a professional repair technician who can reshape the kayak using specialized tools and techniques.
What should I do if the foam wall separating the cockpit from the dry compartments becomes loose?
Remove the loose foam wall carefully. Clean the area and apply marine-grade adhesive to both the kayak and the foam wall. Press the foam wall firmly into place and hold it in position until the adhesive sets. Ensure a secure bond by following the adhesive manufacturer’s recommended curing time.
How can I adjust the outfitting of my kayak for better comfort and control?
Adjust the seat position, footrests, and thigh braces to achieve a comfortable and ergonomic fit. Experiment with different settings to find the best alignment for your body. Additionally, consider adding foam padding or support to enhance comfort and provide better control during your kayaking adventures.